QuickBooks Import
WyzBooks can import your data from QuickBooks for Mac using IIF files (for lists and accounts) and CSV reports (for transactions). The Import page walks you through a 4-step process.
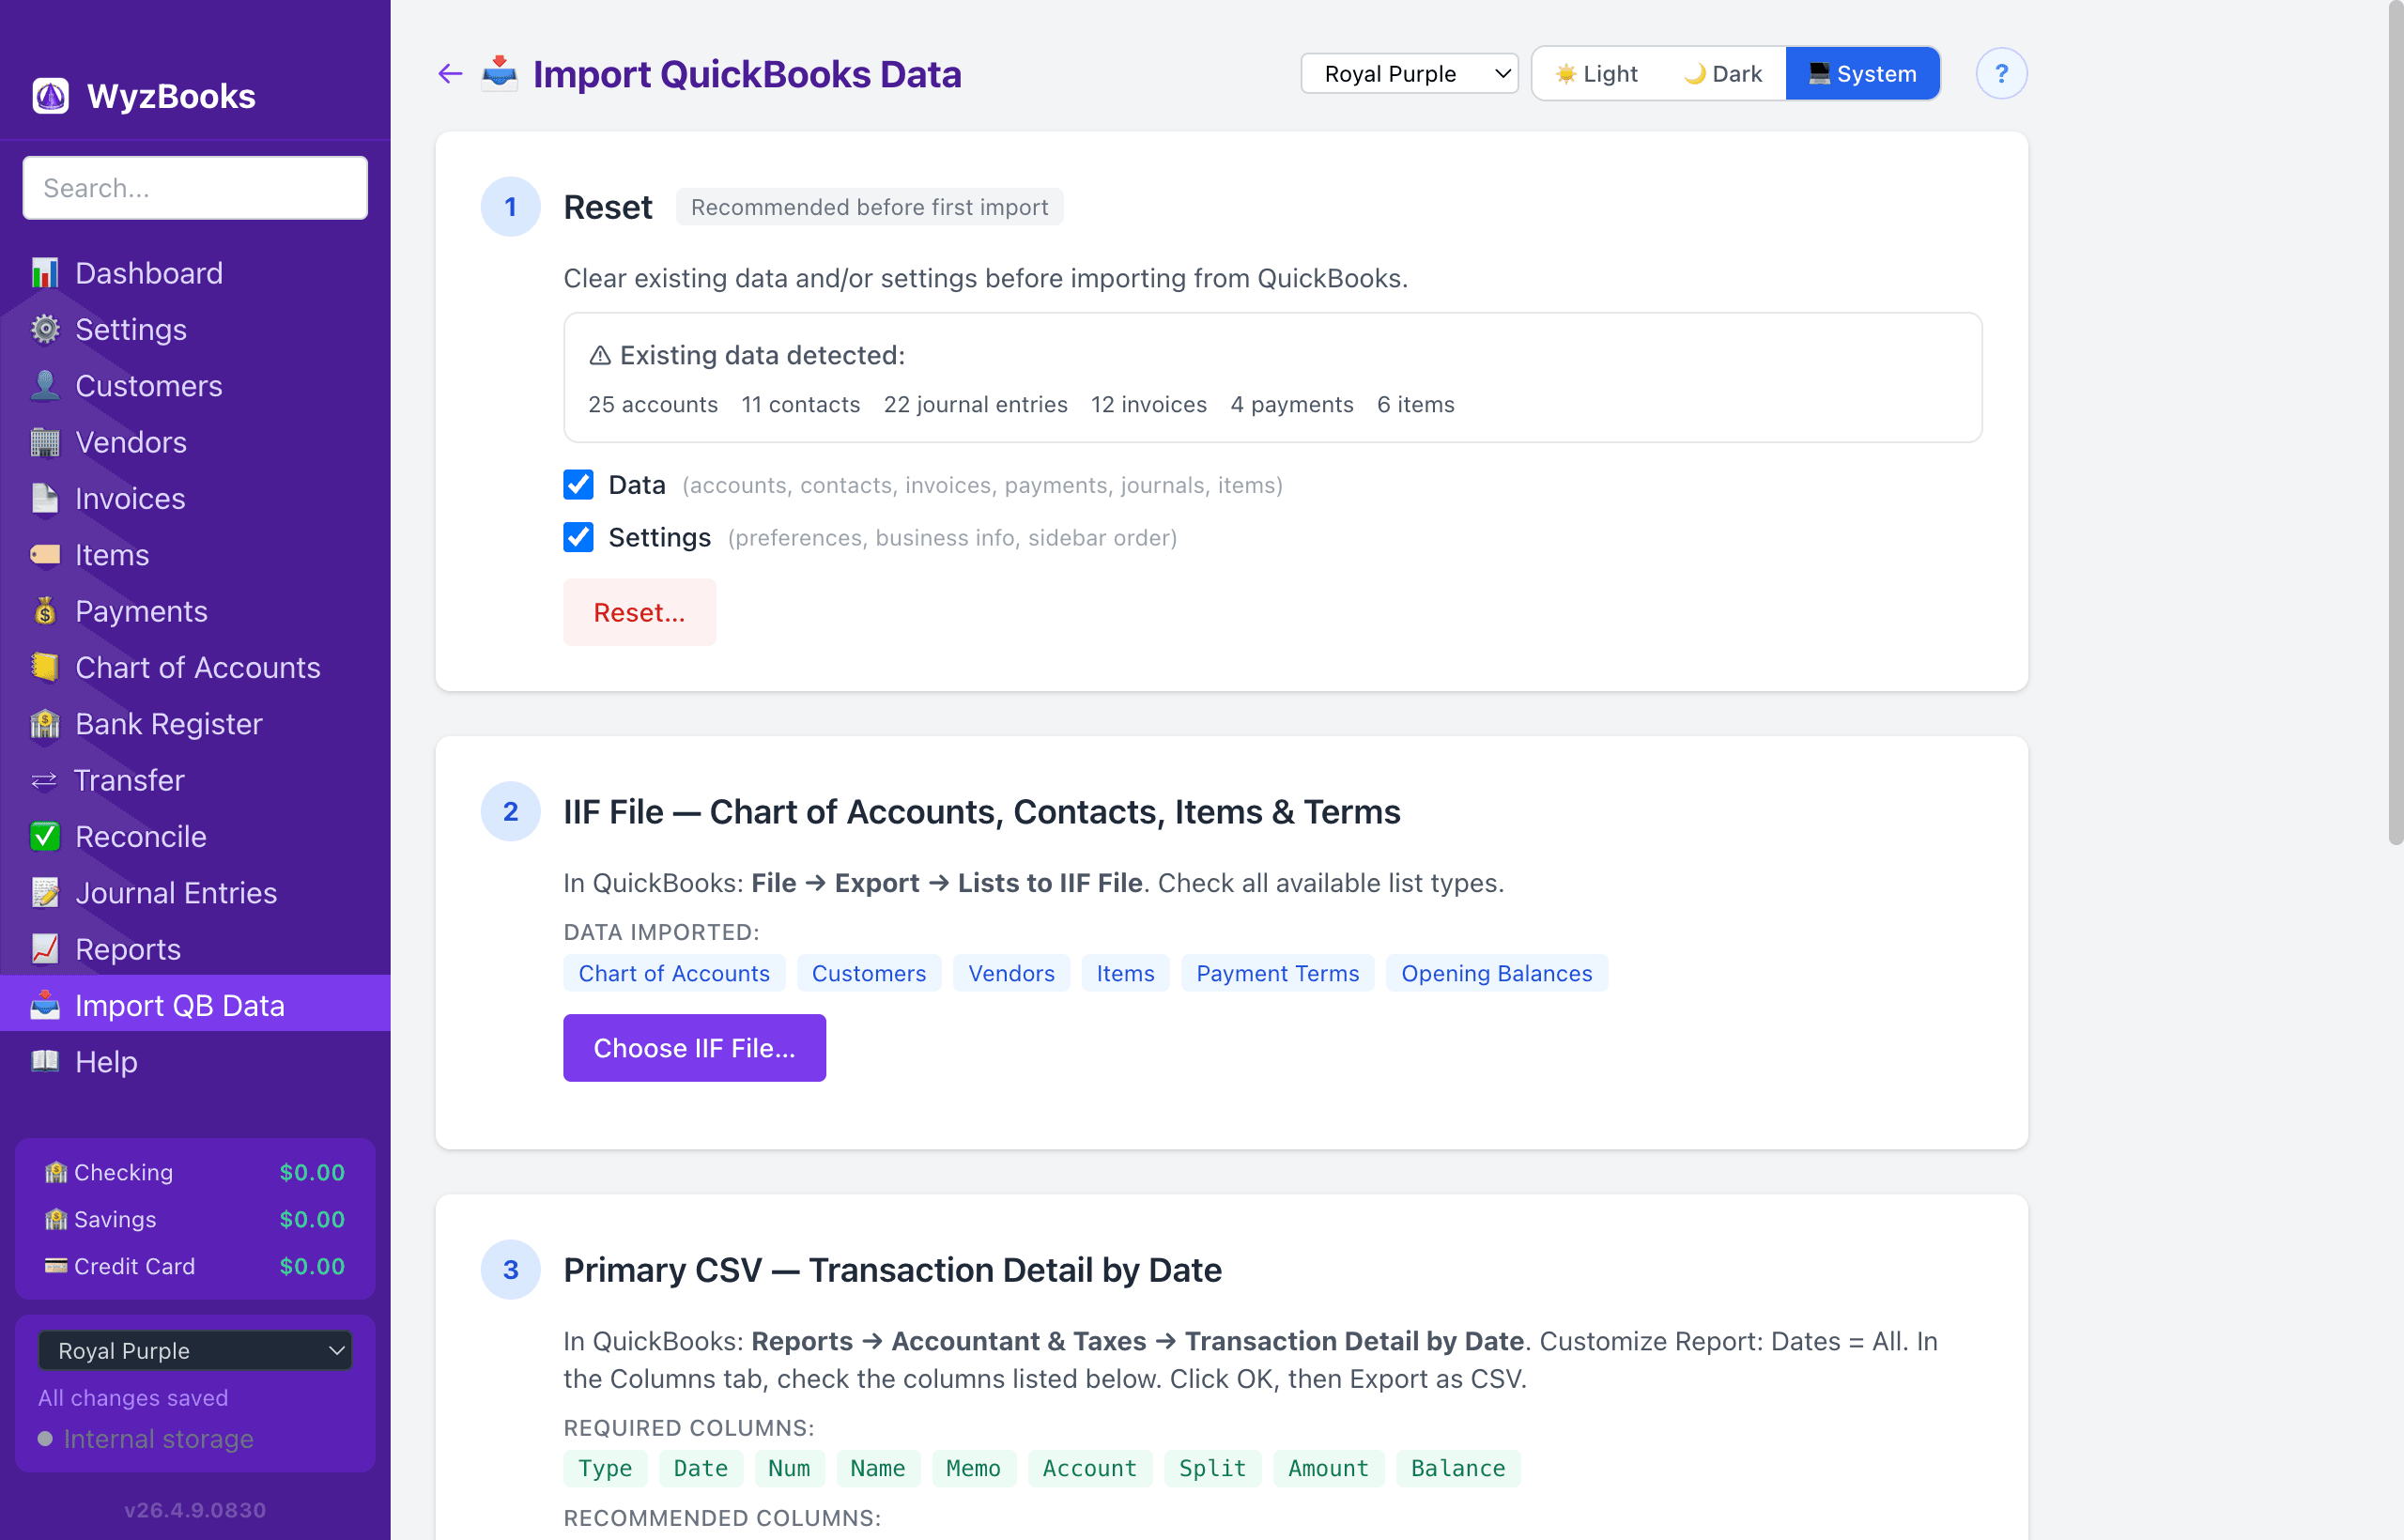
Step 1: Reset Data
Clear all existing data before a fresh import. This erases all accounts, contacts, invoices, payments, journal entries, and items. The reset shows current data counts and requires a confirmation dialog before proceeding.
Always reset before a full re-import to avoid duplicate transactions.
Step 2: IIF File (Chart of Accounts, Contacts, Items)
- Export from QuickBooks: File → Export → Lists to IIF File. Check all available list types.
This imports your Chart of Accounts (with account types, numbers, hierarchy, and opening balances), Customers, Vendors, Items (with prices and linked accounts), and Payment Terms.
- Options: "Replace entire Chart of Accounts" (vs. merge with existing), and "Merge contacts" (update existing contacts with missing fields instead of creating duplicates).
If the IIF file contains transaction data (TRNS/SPL records), invoices and sales receipts are also imported with self-payment records for cash sales.
Step 3: Primary CSV (Transaction Detail by Date)
- Export from QuickBooks: Reports → Accountant & Taxes → Transaction Detail by Date. Set date range to All. Click Export, save as CSV.
- Required columns: Type, Date, Num, Name, Memo, Account, Split, Amount, Balance.
- Recommended columns: Clr (reconciliation status), Due Date.
This imports all transactions as journal entries, creates invoices with line items, creates payment records, and runs A/R reconciliation (FIFO matching of payments to invoices per customer).
The import auto-detects the CSV format (Transaction Detail, Trial Balance, A/R Aging, A/P Aging, Customer List, or Vendor List) and processes accordingly.
Step 4: Item Detail CSV (Optional Enrichment)
- Export from QuickBooks: Same report as Step 3, but with Item, Qty, and Sales Price columns checked in Customize Report → Columns tab.
- Required columns: Type, Date, Num, Item, Account, Qty, Sales Price, Amount.
This enriches existing invoices (from Step 3) with item names, quantities, and rates. It does NOT create new transactions or change account balances.
Descriptions are preserved from the primary CSV's Memo column — the Item column from this file provides the item ID only.
Recommended Dual-File Approach
For the best results, use two CSV exports:
- File A (Step 3): Standard Transaction Detail — has correct amounts for all transactions.
- File B (Step 4): Same report with Item/Qty/Sales Price columns — enriches invoice line items.
This gives you correct account balances AND proper invoice detail. Account balances are identical between File-A-only and dual-file imports.
CLI Automated Import
Run the full pipeline from the command line:
npm start -- --reset --iif data.iif --csv transactions.csv --csvb items.csv
Or with the built application:
WyzBooks.app/Contents/MacOS/WyzBooks --reset --iif data.iif --csv txn.csv --csvb items.csv
Verifying Your Import
After importing, use Reports → Compare with QB to verify data accuracy. Upload a QB Trial Balance CSV first — it is the best single report for verifying overall accuracy.
The comparison handles QB subaccount paths (e.g., "Telephone:Cellular") and accounts exported without numbers. Use the Copy Results button to paste comparison data into a spreadsheet for analysis.
You can also run the comparison from the command line:
npm start -- --compare trial qb-trial-balance.csv --date-from 2025-01-01 --date-to 2025-12-31
Import Logs
Every import session is logged to ~/.wyzbooks/ as a timestamped .log file (e.g., import-2026-03-05T142530.log). The log accumulates across steps (Reset → IIF → CSV → Enrichment) and is updated after each step. Each step's log is also displayed inline on the Import page with a Copy button.